In March of 2024 Canva acquired Affinity from Serif, and now in 2025 in a surprise move have made the Affinity suite an all in one application and offer it FREE forever. The product suite includes:
Graphic design Everything you need for vector design and digital illustration
Photo editing Professional image editing and retouching tools
Page layout The most powerful page layout and design tools
Canva integrations (with a Canva PRO account) Streamline workflows with Canva AI and easy export
While the catalogue location does remain a big issue for me, I am pressing onward as so far I am liking the way On1Photo Raw processes the images. And I am quite impressed with the results of the NoNoise component!
I think I may try to stick with it for new images, despite the aforementioned catalogue issue described in the previous posting, which would mean I will still need to find something to work as a DAM for my image archives.
The New Truth: I have joined the On1 affiliate team so going forward any links to On1 products will most likely be affiliate links.
Adobes latest change to their TOS (Term Of Service) which I and many others find not very acceptable was the kick needed to finally start actively looking to migrate to alternate platforms. So the switch from Adobe has begun in earnest.
I had already switched from Adobe Premier to Black Magics Davinci Resolve as a video editor. And now have purchased On1 Photo RAW as a very promising good candidate to replace my long standing association with Adobes Photoshop and Lightroom. I have been using photoshop for decades from way back when I started on version 2 in 1991/1992.
While there are many photo editors out there both free and paid, not many have a robust integrated library management system. So one of the hardest part was deciding on something that might work as a replacement DAM (digital asset management) solution for my tens of thousands of images most stored in adobes dng format, that have accumulated over my 1/2 century (Yikes) of poking around in the business of photography.
I’ll try to post updates as I find time to work on the migration to a new platform, when I am in country, Couple of biggish trips to far off destinations are in the works at the moment where I won’t have access to my main servers.
if you are also interested here is the link to On1 Photo Raw, they do have a 30 day trial!
These are the new and just updated for 2023 TOP 10 software packages I currently use for my image and video editing. As well as the hardware I use to run them on.
Surprisingly six of the ten programs can be had FREE for non-commercial use! While three are subscription model products, and one is free but requires custom proprietary hardware.
Links to all the applications both free and paid are at the bottom of page.
The Software
What I edit still images with:
Name
Description
Adobe Creative Cloud Lightroom Classic
Image developer and catalog
Adobe Creative Cloud Photoshop
Image Editor
Picolay
Focus stacker by Heribert Cypionka
What I use to edit still images
My image catalog database is currently
Adobe Creative Cloud Lightroom (Image developer and catalog)
What I create videos with:
Name
Description
Blackmagic DaVnci Resolve 18
Insanely powerful video and audio editor
OBS Studio
Screen capture and live stream
qDslr dashboard
Tethering and time-lapse
Handbrake
Video converter
Audacity
Audio editor
What I uses to create videos
The Hardware
The Monitors
ASUS ProArt PA248 (Main image editing display)
Samsung S27R350 (Text and control panels)
Samsung S27R350 (everything else)
The rapidly ageing eaters of bits
Custom built Intel I7 system with
32Gb RAM
2 * 512Gb SSD + 2 * 4Tb sata3 internal drives
Nvidea rtx 1650 4Gb video card
Wacom Intuos 3 9*12 tablet
Custom built Intel I5 system with
16Gb RAM
512Gb SSD + 4Tb sata3
Nvidea rtx 1030 2Gb video card
Backup & Stability
Acronis Cyber Protect Home Office (data backup)
A random array of Western Digital external drives (backup medium, on and offsite)
Apc UPS unit(s) (power stabilization)
Here are the links to all the products if you want to get any them
Adobe releases their new versions of many products.
Of Interest to photographers are the former Adobe Lightroom CC has been renamed to Lightroom Classic CC
And the new Lighrtoom CC is now cloud based.
New plan pricing
Lightroom CC plan
Includes the all-new Lightroom CC and 1TB of cloud storage.
US$9.99/mo.
Photography plan
Includes the all-new Lightroom CC, 20GB of cloud storage, Lightroom Classic CC, and Photoshop CC.
US$9.99/mo.
Photography plan with 1TB cloud storage
Includes the all-new Lightroom CC, 1TB of cloud storage, Lightroom Classic CC, and Photoshop CC.
US$19.99/mo.
That’s US$10/mo for 980meg of additional storage?
In a year you could by a 4tb drive for the same amount, and handle your own backups.
For now think I will stick to the base photography plan!
Only time will tell how this will work out for them, but working in high end “cloud” systems for years I would not trust my personal important data to any of them.
Hacks, cracks, thefts and redundancy failures oh my.
Now the fun starts checking in on just how well these updates and new programs really work!
As per my Ethics guidelines I must state I have not purchased this particular product.
At time of writing I am not currently affiliated with or sponsored by Sleeklens.
I was recently asked to provide a review and my thoughts on a product by Sleeklens called “Through the Woods” a Lightroom landscape preset workflow. Sleeklens produces presets and action sets for Adobe Lightroom and Photoshop CC.
After agreeing to a few terms to do the review the product arrived as a zip file
That contained several PDF files
A readme first PDF that contained a link to the installation video and an invitation to join the sleeklens Facebook group for support.
A TOS (Terns of Service)
A how to install PDF
A “recipe” list to help get you started.
And two folders, one for brushes with 30 brushes in it and one for presets containing 51 presets.
Install was mostly painless especially if you follow the included instructions.
I in my usual way managed to get it exactly backwards and had to do a bit of uninstalling/reinstalling.
To Install presets follow the video linked in the install document.
To Install brushes follow the instructions in the install document.
Screen grab of the presets and brushes that are a part of the Through the Woods collection
Hint: all images in this post can be clicked to open a new window/tab with a larger easier to see image.
sample of what the presets and brushes look like
The sample shows one of my annoyances with Adobe Lightroom, while LR presets can be grouped into collapsible sections. LR brushes cannot, you are always scrolling through huge lists to get to the one you want which is invariable at the bottom of the list.
To test what the presets and brushes could do I selected one very over exposed image, one very under exposed image and one with an average exposure but mediocre image.
In all cases these images would normally have seen the big X of rejection in Lightroom.
Here are the images and the “recipes” as Sleeklens calls them that I used to process the three images.
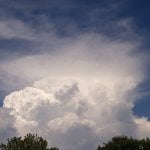
Image 1 – The Over Exposed image.
Original on left, Sleeklens processed on right.
Over exposed image processed with sleeklens workflow
Over exposed image processed with sleeklens workflow
The Recipe used
Presets
All in one – Dawn rising
Exposure – Less Highlights
Color – Deep blue sky
Tone/Tint – Color pop
Polish – Sharpen
Brushes
brighten (applied to land and reflection)
brighten (applied to land)
add golden sun (reduced effect, applied to land and reflection)
Manual settings
Manually reduced Saturation to +19 and Vibrance to +40
Manually adjusted cyan cast in sky towards blue
Manually reset black/white points
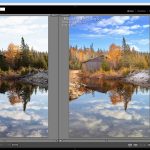
Image 2 The Under Exposed image.
Original on left, Sleeklens processed on right.
under exposed image sleeklens preset test
The Recipe used
Presets
Base – High Dynamic Range
Base – Morning light
Exposure – Less Highlights
Exposure – Brightnen Shadows
Tone/Tint – color pop
Polish – Sharpen
Brushes
Brighten (applied to land)
Add golden sun (reduced effect, applied to portions of land and reflection)
Graduated filter
cloud definition
Manual settings
Manually reduced Saturation to +19 and Vibrance to +21
Manually reset black/white points
Image 3 The average exposure average image.
Original on left, Sleeklens processed on right.
average exposure image sleeklens preset test
The Recipe used
Presets
All In One – Shine into Sunset
Polish – Sharpen
Brushes
Brighten (applied to land)
Add golden sun (applied to land)
Darken (applied to a tiny portion of land)
Graduated filter
cloud definition
Manual settings
Manually reduced Clarity to +30 Saturation to +30 and Vibrance to +5
Manually slightly increased overall exposure and reset black/white points
My thoughts
Now for my thoughts on the Sleeklens workflow presets and using presets in general.
The Sleeklens presets and brushes do seem to work well to help process images, or at least get you to a good starting point for heavier editing fairly quickly.
In many cases I had to dial back the effects as they seemed to be a bit over the top.
But that is probably common for development presets as every image is different and would need some custom adjustments tinkering.
They did have an interesting stack able capability where you could apply as many of the presets as you wished and they did not affect each other.
What is a preset
A preset or brush is just a Lightroom setting (or settings) you come up with that you then save with a name. Which you can then recall with a single click and apply it to other images as needed thus saving you some time.
With purchased presets like the Sleeklens collections you are buying settings created by people skilled at editing and processing images.
You are getting some of their expertise instead of trying to re-invent the wheel by creating your own preset sets.
You still need to learn to use presets and brushes properly and take the time to apply them to each image, there is no magic auto fix!
My personal workflow
The “presets” I do use daily are smart collection workflow driven.
They are based on moving images from import to distribution in a quick timely fashion with very little actual image development to try to recover a flawed image.
The majority of my own under/over/mediocre images usually meet the rejection trashcan very quickly.
With the “Through the Woods” landscape presets there is the option of trying a few presets to adjust or recover some of my images if so desired.
Though even in Lightroom it now seems possible to repaint an images so it looks quite different from what was originally photographed.
Links to Sleeklens products and services if you are interested
And finally Sleeklens has a fairly active and informative YouTube Channel
This site or affiliated service providers may use cookies, continuing to access resources on this sites constitutes an acceptance to the use of cookies and our Terms of Service.